To create and edit our video we used the software Final Cut because we felt this would give us more technical expertise than imovie, most specifically the fact that Final Cut gives you the option of using multiple layers of audio and video. The most technical bit of editing I did was split screens that were used in the chorus.


To create a split screen, I first had to layer my video, the next stage is to double click on the desired click, this will then bring up your clip on the central viewer (left). On this viewer you have the options to look at the tabs Video/Filters/Motion, to adapt to a split screen I had to click motion. To create this split screen I changed the scale (top under basic motion) of the clip, to make it smaller, cropped the clip and moved the centre to the desired place. Once done for one clip, repeat with the second clip and it gives you the feel of a split screen. To refine the split screen I played with the cropping settings of each clip as well as feathering the edges of the clip, which can also be done on the Motion tab. This was done for the intial split screen as well the four split screen.

I also used the motion tab to create the effect that you see with the bear mask in the mirror scene. We had to film our protagonist doing the same movement twice, once with the bear mask and once witout. When it came to editing, I used the cropping tools on the motion tab to crop the two clips so that you can see a mask less Jack looking into a mirror that shows his reflection with a masked Jack. I also played with some of the Brightness and Contrast in the filters tab, to make the brightness and contrast equal in both clips.

I also played with the Brightness and Contrast for the "flashback" scenes which can be seen here, I also desaturated these clips to give the effect of a flashback as you can see here. You manipulate these with the 'Brightness and Contrast' and 'De saturation' filters which are found in the Video Filters section of the Effects tab. On top of this we used a few transitions in our video, the only two transitions we used were cross dissolve and fade in/out. To create these transitions, I simply dragged the chosen transition from the "Video Transitions" drop down box in the effects tab. The most noticeable use of transitions are in the prechorus sections and the final fade out.
To create our website we used Adobe Dreamweaver. We chose Dreamweaver because of its inclusion in the Adobe Products package therefore it helps us link with Photoshop, which we used for our Digipak, and Flash to create our professional looking website.
To create this website a mix of flash and HTML code was used. The most challenging part of the website to create was the scroll box using HTML. This is due to the difficulty in creating our own style from a code template found on the internet. In order to do this succesfully we needed to first generate the code with all our text in to it. This is easier than trying to type what we wanted in the area manually. With this simple code created externally we had to modify the widths and height to fit our website. We also then changed the colour of text and added a horizontal rule to seperate the information.
To ensure all the media we planned to be seen on our website was viewable when live, we had to import all our photos, videos and animations in to a folder to link to. This folder would have to be on the server of the person hosting our website. This is a simple stage in creating the website and ensuring it works properly once hosted but it can also be easily forgotten and often causes mistakes with websites due to content missing.
For animated flash elements of the website they were created in Adobe Flash. As stated earlier it is linked with the same package as Dreamweaver making it easily compatible. The animations were imported as movie files to play without being on a loop. This therefore looks like a heading and menu system rather than a separate part of the website. Due to the black background and same colours it ties in well and makes the whole webpage look seemless.
The digipak was produced primarily using Adobe Photoshop, For our photoshoot we used the three male members of our group, Me, Jack and Sam. The aim was to achieve a blurred effect, to create this blurred effect we reduced the shutter speed on the camera as well simply moving the camera slightly mid capture.

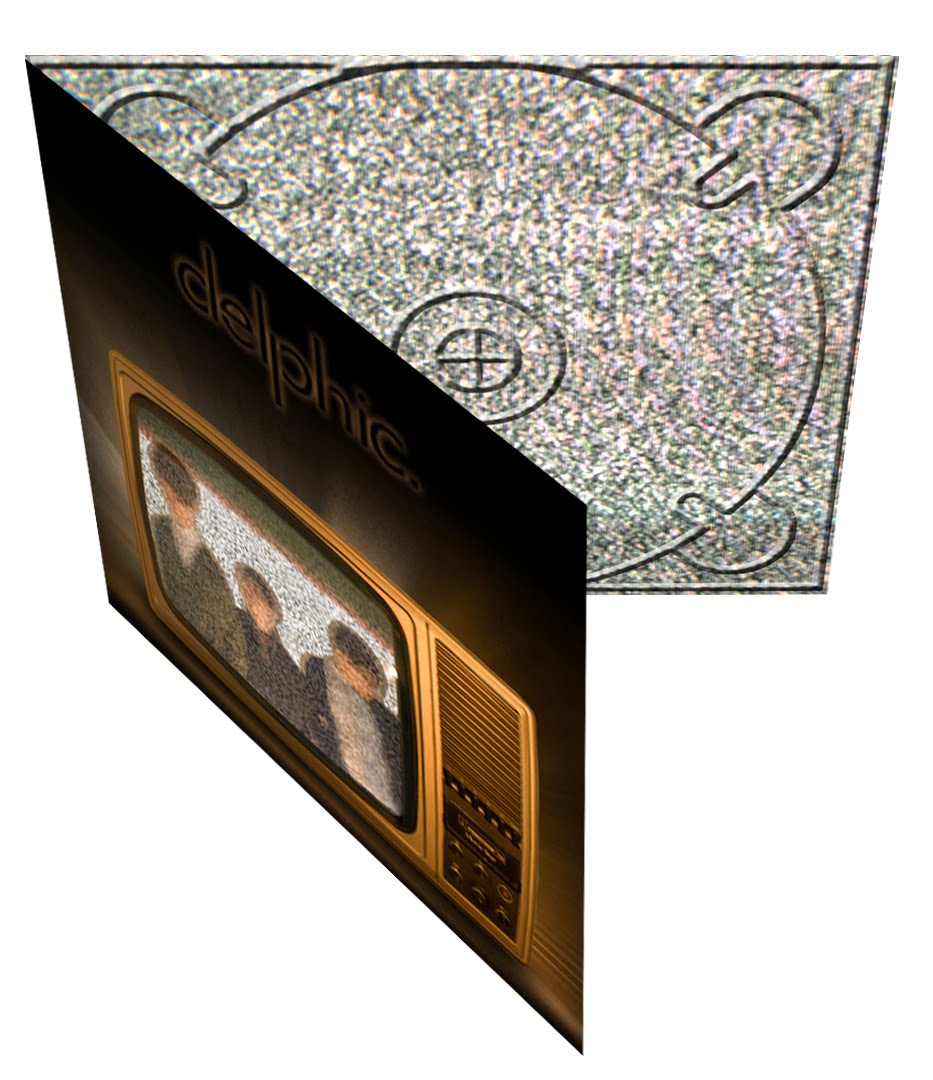
In Photoshop we took down the opacity of our band photo and then layered with the television static. Furthermore we added a gaussian blur efffect to achieve the bright glow. To complete the album artwork we placed in our logo and added a glow to match the television.
For the reverse of the digipak we used another photo from the band shoot which featured all three of us in ascending height order, we placed this into a photoshop document and simply overlayed the track listing in text boxes. We also zoomed in on two of the jaws of people in the original photo, unfortunately it was felt that the colour of the original photo didn't correspond well with the television on the front. Therefore to maintain a consistent colour scheme we altered the colouring to give it a slight orange tint. The same thing was applied to the inside panel.
For the inside panel we created the same effect as the band in the static on the album artowork. So we layered two photos and altered the opacity of both pictures to create the overlay you can see. Opposite this is the CD tray panel for this we just cropped some of the television static from our original photo to retain the image throughout. Then apply a bevel and emboss on a CD template, to create the tray effect.

To finish the product we wanted to create it in a 3D sense, to give it that effect of an existing digipak. This was done using a 3D template; we then changed the perspective of each panel to place them correctly.
No comments:
Post a Comment